Struggling with sinking legs or feeling exhausted after just one lap? The secret to a smoother, more powerful swim often lies in your foundation: the freestyle kick. It’s more than just splashing; a proper kick provides balance, lifts your body, and creates a streamlined profile that lets you glide through the water.
This ultimate guide is designed to show you exactly how to do freestyle kick technique the right way. We’ll break down the motion step-by-step and identify common mistakes, transforming your stroke from a tiring struggle into an efficient and powerful movement. Let’s begin.
Before You Start: The 3 Golden Rules

Before we dive into the steps, commit these three non-negotiable principles to memory. They’re the absolute foundation for developing a powerful and efficient freestyle kick. Get these right, and you’re well on your way to mastering your technique.
Kick From Your Hips
This is perhaps the most crucial rule. The propulsion in your freestyle kick genuinely comes from your core and hips, not from a forceful bend or push with your knees. Think of your entire leg, from your hip down to your toes, as a single, long whip.
The ‘handle’ of this whip is securely anchored at your hip. When you initiate the kick, you’re driving the movement from this powerful central point, allowing the energy to transfer all the way down your leg.
If you’re kicking predominantly from your knees, you’ll find yourself pushing a lot of water downwards, creating drag and quickly fatiguing, rather than driving yourself forward. Focus on engaging your glutes and abdominal muscles to power each downbeat and upbeat of your kick.
Keep Ankles Loose
Your ankles are your natural propulsion devices, but only if they’re relaxed and flexible. Imagine your feet are like a pair of floppy, natural fins. When your ankles are stiff or rigid, your foot acts like a flat paddle, pushing against the water and creating significant resistance – essentially, it’s like putting a brake on your body.
Instead, you want your ankles to be relaxed enough to allow your foot to extend and ‘whip’ through the water with minimal effort on both the upstroke and the downstroke.
This relaxed state allows your foot to catch and push more water effectively, contributing to your forward momentum. Practice pointing your toes gently as you kick, ensuring there’s no tension in the ankle joint.
Knees Bend Passively
This rule directly relates to the first one about kicking from your hips. Your knees will bend slightly on their own, but this should be a natural, passive reaction to the powerful movement initiated from your hips. You should never actively try to bend your knees.
Actively bending your knees leads to what’s commonly known as a “bicycle kick” – where your legs appear to be cycling through the water. This type of kick is highly inefficient, creates excessive drag, and wastes a huge amount of energy without providing much forward propulsion.
Instead, allow your legs to remain relatively straight, with just a gentle, relaxed flexion at the knee as your foot extends and then recovers. The movement should look fluid and continuous, not jerky or ‘broken’ at the knee.
The Technique: A Step-by-Step Breakdown

Mastering the freestyle kick involves more than just getting in the water and flailing your legs. We’re going to build your technique systematically.
Part 1: Dry Land Practice (Building Muscle Memory)
Before you even dip a toe in the water, these foundational movements will help you understand and control the correct mechanics of the freestyle kick. Practising out of the water removes the complexities of buoyancy and resistance, allowing you to focus purely on form.
Step 1: The Seated Kick
This drill helps you isolate the basic up-and-down kicking motion and ingrain the crucial habit of kicking from your hips.
What to do: Find a comfortable spot to sit on the edge of a pool deck, a sturdy bench, or a robust chair. Extend your legs straight out in front of you, ensuring your heels are off the ground and your legs can move freely.
The Motion: Begin by kicking your legs up and down in a small, alternating motion. The key here is to focus intensely on initiating every movement from your hips and glutes. Visualise your entire leg swinging from the hip joint.
Crucially, your legs should remain relatively straight, with only a very slight, passive bend at the knee. Pay close attention to your ankles; they should be relaxed and floppy, almost as if they have no bones in them.
Think about pushing the top of your foot and the front of your shin downwards on the downbeat, and lifting the back of your leg and heel on the upbeat.
The Goal: The primary aim of the seated kick is to feel that distinct “up-and-down” motion originating from your hips, without developing the common bad habit of overly bending your knees. It teaches your body that the power comes from higher up, not just from the lower leg.
Step 2: The Prone Kick
Once you’re comfortable with the seated kick, the prone kick further reinforces the “kick from the hip” golden rule by putting your body in a position that naturally encourages glute and hip engagement.
What to do: Lie on your stomach on the floor. If you have access to a workout bench, you can lie on that and let your legs hang freely off the edge from the hips down. This hanging position can further emphasise the hip initiation. Ensure you have enough space for your legs to move without hitting anything.
The Motion: Lift your legs just slightly off the floor or bench. Now, begin the same small, fast flutter kick motion you practised in the seated position. Because you’re lying on your stomach, with gravity providing some resistance, you’ll be naturally forced to use your glutes and hips to power the movement of your legs.
Feel the muscles in your backside and lower core working with each kick. Maintain that relaxed ankle and relatively straight leg, allowing the subtle, passive knee bend to occur naturally.
The Goal: This step’s goal is to directly feel and activate the muscles in your hips and glutes, reinforcing that the driving force of your kick comes from these powerful core areas. It helps cement the idea that your legs are extensions of your core, not independent flailing limbs.
Part 2: In-Water Practice (Putting It All Together)

Now that you’ve built that crucial muscle memory on dry land, it’s time to transition those movements into the pool. The water’s resistance and buoyancy will add new dimensions, helping you refine your technique and truly feel the propulsion of a correct freestyle kick.
Step 3: Kicking At The Wall
This step is your initial introduction to feeling the water’s resistance against your carefully trained dry-land kick, while also getting comfortable with your body position.
What to do: Head to the shallow end of the pool. Hold onto the edge firmly with both hands, extending your body straight back so you’re floating on your stomach, fully stretched out in the water.
The Motion: Lower your face into the water, remembering to gently blow bubbles out of your nose to manage your breath. Now, begin your continuous flutter kick. Make sure to look down at the bottom of the pool to help keep your head, hips, and feet aligned in a straight line.
Focus on producing small, rapid splashes. The water around your feet should look like it’s “softly boiling” – a sign of efficient, narrow kicks – rather than creating large, unruly splashes that indicate wasted energy. Maintain a relaxed ankle and kick from the hip, just as you practised on land.
The Goal: The aim here is to familiarise yourself with the sensation of kicking against the water’s resistance while steadfastly maintaining a straight and streamlined body line. This drill helps build your feel for the water and ingrains proper horizontal alignment.
Step 4: Kicking With A Kickboard
With the kickboard, you can focus almost exclusively on your lower body, allowing you to build strength, balance, and directional propulsion.
What to do: Grab a kickboard and hold it with both hands, extending your arms fully in front of you. Ensure your shoulders are relaxed and not hunched up towards your ears, maintaining a long body line.
The Motion: Push off the wall with a strong glide and immediately begin kicking across the pool. Keep your head down as much as possible, looking at the bottom of the pool. Lift your head only briefly and minimally to take a breath, then quickly return it to the water.
Concentrating on keeping your kick narrow is vital here – your feet shouldn’t be coming wide apart, nor should they be breaking too far out of the water. Aim for consistent, compact movements.
The Goal: This drill is designed to help you practise kicking while actively moving forward and maintaining essential balance. The kickboard provides the necessary support for your upper body, freeing you to dedicate 100% of your attention to refining your lower body’s technique and building endurance.
Step 5: Kicking In A Streamline Position
This is the ultimate assessment of your kick’s efficiency and power, forcing you to rely solely on your leg drive.
What to do: Push off the wall into a tight “streamline” position. This means one hand is placed directly over the other, your arms are squeezed tightly against your ears, and your face is looking directly down into the water. Ensure your body forms the longest, thinnest line possible.
The Motion: Hold this incredibly tight and streamlined position and endeavour to propel yourself across the pool using only your kick. You’ll immediately feel how effective your kick is. If you find yourself slowing down quickly, or if your legs start to sink noticeably, this indicates areas for improvement.
Focus on increasing your kick’s tempo, ensuring those powerful hip-driven movements, and, crucially, keeping your core tight throughout. A strong core supports your legs and maintains that vital horizontal body position.
The Goal: The purpose of kicking in a streamline position is to use your kick for unassisted propulsion, compelling you to maintain a rock-solid core and exemplary body line. It’s a true test of whether your dry-land and kickboard practice has translated into effective, independent movement.
Step 6: Integrating Into The Full Stroke
Finally, it’s time to blend your refined kick into the complete freestyle arm stroke, creating a fluid and powerful whole.
What to do: Begin swimming full freestyle, coordinating your arm strokes with your breathing.
The Motion: As you swim, consciously avoid trying to kick with immense, overwhelming power. Instead, shift your focus to maintaining a constant, steady kick as your arms are pulling and recovering. Here, the kick’s primary job is to provide rhythm and essential stability, helping to keep your legs high and buoyant in the water.
This elevated leg position allows your arms to perform their propulsive work efficiently, without dragging a sinking lower body. Think of your kick as the consistent engine that stabilises your foundation while your arms drive you forward.
The Goal: The final goal is to seamlessly blend your new-and-improved kick into your complete freestyle stroke, resulting in a balanced, coordinated, and far more efficient swimming style. This integrated approach is key to achieving consistent speed and endurance in the water.
5 Common Freestyle Kick Mistakes And How To Fix Them Fast

Even with the best intentions and practice, it’s easy to fall into common traps when learning the freestyle kick.
These errors can significantly hinder your progress, making you work harder for less speed. Here, we’ll identify the most frequent mistakes that hold beginners back, explain why they’re inefficient, and provide quick, actionable fixes for each.
1. The “Bicycle Kick”
What It Is: This is arguably the most common and persistent mistake among new swimmers. It involves an excessive bending of the knees, coupled with a pushing motion that directs water downwards, almost as if you’re pedalling a bicycle underwater.
Why It’s a Problem: This motion creates immense drag, acting like a giant underwater brake. It provides virtually zero forward propulsion, meaning you expend a lot of energy and get tired quickly, yet move very little.
Crucially, it pushes your body upwards instead of forwards, which often leads to your hips dropping in the water, further increasing drag.
How to Spot It: You’ll likely feel your knees rising up towards your stomach or even breaking the surface of the water with each kick. Visually, your legs will resemble someone cycling.
The Quick Fix: The kick must initiate from your hips. Think of your entire leg as a straight whip, with the power coming from your core, not a pedalling lever driven by your knees. Focus on keeping your legs relatively straight, allowing only a passive, natural bend at the knee.
2. Stiff “Frankenstein” Ankles
What It Is: This occurs when a swimmer tenses their ankle joint, locking it into a rigid, 90-degree angle (a flexed foot). In this position, your foot essentially acts like a flat paddle pushing against the direction you want to move.
Why It’s a Problem: A stiff, flexed foot creates a significant amount of resistance. Instead of gracefully slicing through the water and then efficiently pushing it backwards for propulsion, it creates a wall that actively slows your momentum with every single kick. It’s like trying to drive with the handbrake on!
How to Spot It: Pay attention to your feet as you kick. Are they pointed gracefully, like a ballet dancer’s foot? Or are they flexed and rigid, as if you’re standing on solid ground? If they’re flexed, your ankles are far too stiff.
The Quick Fix: Cultivate “floppy” or “loose” ankles. The water’s pressure should be able to gently bend and extend your ankle for you, allowing your foot to ‘whip’ through the water. Using training fins is an excellent way to help your body understand and feel this relaxed, propulsive ankle movement.
3. The “Scissor Kick” (Kicking Too Big)

What It Is: This is characterised by a kick that is excessively wide and often slow. The legs separate far apart in a large, scissor-like motion, frequently moving well outside the natural width of the swimmer’s body.
Why It’s a Problem: A wide kick drastically compromises your streamlining, significantly increasing your frontal drag in the water. It makes you much less hydrodynamically efficient.
Beyond that, it’s a very slow and energy-intensive movement, disrupting your body’s essential balance and natural rotation as you swim.
How to Spot It: If you have a friend observe you from the end of the lane, they’ll see your legs flailing outwards. Ask them: do your legs mostly stay within the ‘shadow’ of your torso, or do they splay out wide with each kick?
The Quick Fix: Embrace the mantra of “small, fast flutters.” Your feet should ideally only just break the surface of the water, creating a “boiling water” effect rather than large, dramatic splashes. Focus on keeping the kicking motion compact, quick, and contained within your body’s silhouette.
4. The Sinking Legs Problem
What It Is: This frustrating issue occurs when a swimmer’s legs and hips drag low in the water, sometimes pointing almost directly down towards the pool’s bottom instead of remaining near the surface.
Why It’s a Problem: Sinking legs are a clear sign of poor body position and create an enormous amount of drag. It makes it feel as though you’re constantly swimming uphill, an incredibly physically exhausting experience and one of the biggest barriers to achieving a smooth, effortless swim.
How to Spot It: You’ll undoubtedly feel this. You’ll perceive yourself as heavy and sluggish in the water, and making progress will feel like an immense struggle. Often, your kick will be splashing desperately on the surface but doing very little to actually move you forward.
The Quick Fix: This problem is very frequently a head position issue, not solely a kick problem. Make sure you’re looking directly down at the bottom of the pool, not forward. Simultaneously, gently press your chest and upper body into the water.
This acts like a seesaw, naturally helping to lift your hips and legs closer to the surface. A consistent, efficient kick will then help maintain them in this elevated position.
5. Kicking Only from the Knees
What It Is: This is a more subtle error than the overt “Bicycle Kick.” While the swimmer’s leg might appear relatively straight, the entire movement is visibly initiated from the knee joint, resulting in a weak, ineffective flicking motion rather than a full leg drive.
Why It’s a Problem: All genuine power in swimming originates from your core and large muscle groups, primarily the hips and glutes. By kicking exclusively from the knee, you’re isolating a small, weaker muscle group and generating very little actual propulsion. There’s no effective ‘whip’ effect or transfer of force travelling down the entire leg.
How to Spot It: You won’t feel much propulsive power, and you may not move very fast even when using a kickboard. The motion will feel like a small, isolated flick of the lower leg rather than a powerful, integrated movement of the full leg.
The Quick Fix: Actively practice kick drills on your back or stomach without a kickboard. Crucially, consciously think about squeezing your glutes (your buttock muscles) to initiate every single kick. This deliberate engagement forces the power to originate from your true powerhouse: your hips.
Conclusion About The Freestyle Kick Technique
Developing a strong and efficient freestyle kick is fundamental to becoming a better swimmer. We’ve covered the core principles, from understanding proper body position and ankle flexibility to the importance of consistent, small movements from the hips.
Remember, mastering this skill takes time, patience, and consistent practice. Don’t get discouraged by initial challenges; every session in the water builds muscle memory and refines your technique.
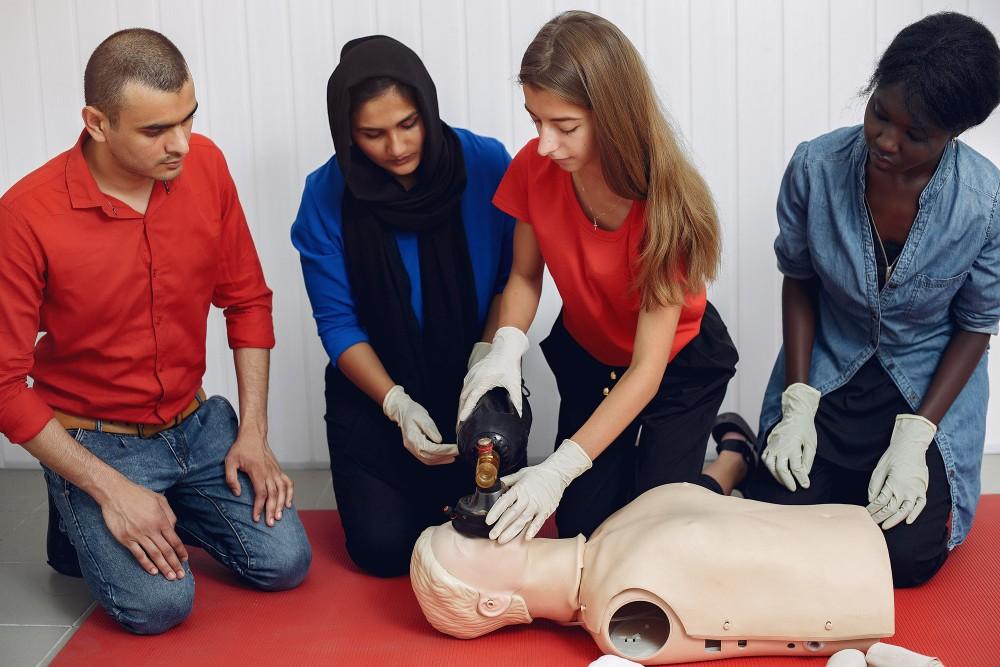
If you’re looking to take your swimming to the next level, whether for yourself or your children, consider JustSwim Singapore.
Established in 2020 by a group of dedicated coaches with backgrounds spanning competitive swimming, triathlons, and lifeguarding, we specialise in private swimming lessons. We believe in the effectiveness of small groups to maximise focus and progression.
Our mission is to deliver the highest standard of swim coaching, focusing on water safety, progression, enjoyment, and affordability.
Our experienced and dedicated coaches are committed to ensuring you pick up swimming, regardless of your current experience. In fact, our coaches stay in the pool with you until you get your strokes just right.
At JustSwim Singapore, we’ve developed a unique teaching approach based on years of experience with major swim schools across Singapore.
This ensures learning is both enjoyable and highly effective, allowing you to master correct techniques while having fun. We also offer customised lesson plans to suit individual needs, catering to everyone from infants and kids’ swimming lessons.
Contact JustSwim Singapore today to begin your swimming journey with expert guidance!
Frequently Asked Questions About The Freestyle Kick Technique
Does A Stronger Kick Always Equate To Faster Swimming?
Not necessarily. While a strong kick provides power, an efficient kick that maintains streamline and conserves energy is often more crucial for sustained speed and endurance.
Are There Specific Ankle Mobility Exercises I Can Do Out Of The Water To Help My Kick?
Yes, exercises like ankle rotations, toe points and flexes, and using resistance bands to stretch the top of your foot can significantly improve the flexibility needed for an effective flutter kick.
Is It Normal To Feel More Tired In My Legs Than My Arms After A Freestyle Swim?
Initially, yes, especially if you’re focusing on kick technique. As your kick becomes more efficient and your legs build endurance, you should find a more balanced distribution of effort.
Where Should My Toes Be Pointing During The Propulsive Phase Of The Freestyle Kick?
Your toes should be pointed directly backwards, almost as if you’re trying to touch the wall behind you. This maximises the surface area of your foot to push water effectively.
When Should I Use A 2-Beat Kick Versus A 6-Beat Kick In Freestyle?
A 2-beat kick (two kicks per arm cycle) is often more efficient for long-distance swimming, conserving energy. A 6-beat kick (six kicks per arm cycle) typically provides more continuous propulsion, often used for sprinting or shorter distances.
Do I Need To Actively Scull The Water With My Feet During The Freestyle Kick?
While your feet will naturally create a sculling motion, the primary focus should be on driving the kick from your hips with relaxed ankles, allowing the foot to ‘whip’ through the water rather than actively sculling.