Ever dreamt of effortlessly floating in the pool, letting the water support you completely? For many of us in Singapore, that peaceful image can feel out of reach when our legs decide to sink. But what if we told you it’s a skill anyone can master with the right technique?
This guide is designed to teach you exactly how to float on your back in water. We’ll move past the frustration with a simple, step-by-step approach. Let’s begin your journey to mastering this wonderfully relaxing and essential skill, setting you up for a lifetime of confidence in the water.
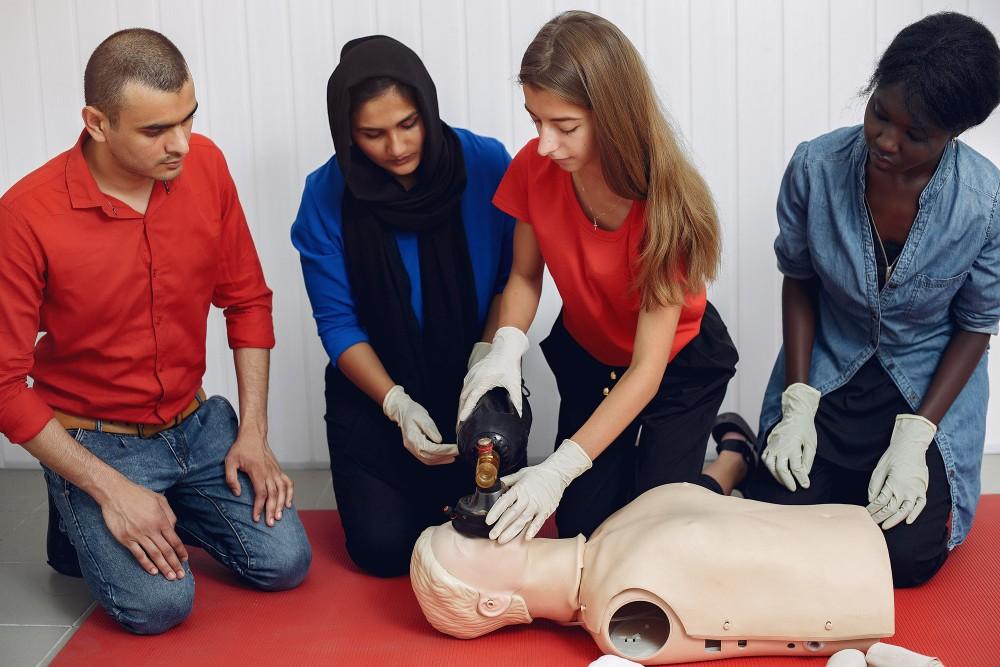
Follow these simple, practical steps to go from a nervous beginner to a confident floater. We’ll break down every part of the process, so you know exactly what to do and, more importantly, why you’re doing it. Let’s get started.
1. Get Comfortable And Relax

Discover why a calm mind and relaxed body are your most important tools for staying afloat.
Before you even attempt to lift your feet off the pool floor, the most crucial work begins in your mind. If there is one secret to floating, this is it: you cannot float if you are tense. It’s a simple matter of physics.
When you are stressed or frightened, your muscles contract and become tight and dense. Dense things sink. Conversely, a relaxed body is more buoyant and will be supported by the water.
So, how do you achieve this state of calm, especially when the water feels unfamiliar?
- Start in the Shallows: Begin in a part of the pool where the water is no higher than your waist or chest. Knowing you can stand up at any moment is incredibly reassuring and removes a huge amount of anxiety.
- Control Your Breathing: Stand still and take a few slow, deliberate breaths. Inhale deeply through your nose, feeling your lungs fill with air, and exhale slowly through your mouth. This simple action signals to your nervous system that you are safe and in control.
- Get Your Face Wet: Gently splash some water on your face or bob up and down a few times. Getting accustomed to the sensation of water on your skin, especially around your head, helps to reduce the shock factor later on.
- Release the Tension: Consciously check in with your body. Are your shoulders hunched up by your ears? Are your hands clenched into fists? Take a moment to actively release that tension. Let your shoulders drop and your hands go limp.
Remember, the water is not something to be fought against. Your goal is to work with it, and that partnership begins with relaxation.
2. Find Your Initial Support
Learn how to use the side of the pool or a friend to build confidence as you get into the correct starting position.
Now that you’re feeling a bit calmer, it’s time to get into position. Very few people manage to float on their first attempt without a little help. Using a stable support allows your body to learn the correct position without your mind having to worry about sinking.
There are two excellent ways to do this:
- Using the Pool Wall: Stand with your back to the side of the pool. Place both hands on the edge behind you, about shoulder-width apart. This gives you a firm anchor. Now, slowly bend your knees and allow your body to lower into the water, letting your back rest against the wall as you lean your head back.
- With a Friend or Instructor: A spotter can provide incredible reassurance. Have them stand facing you and place one hand gently at the base of your neck and the other in the middle of your back. This provides physical support and lets you know that someone is there to keep you steady as you find your balance.
The purpose of this step is twofold. Firstly, it provides physical stability, preventing you from tipping over as you get used to a new orientation in the water.
Secondly, and perhaps more importantly, it builds psychological confidence. It proves to you that you can get into the floating position safely, making it much easier to eventually let go and do it on your own.
3. Lean Back And Submerge Your Ears
We’ll guide you through the crucial step of tilting your head back properly, getting your ears wet is the secret!
This is where most beginners hesitate, but it is the most critical mechanical step in the entire process. Your head position dictates what the rest of your body does.
With your hands on the wall or a spotter supporting you, begin to lean back slowly. Imagine you are reclining in a very comfortable armchair. The movement should be gradual, not a sudden drop. As you lean back, you need to commit to letting your head go all the way back until the water covers your ears.
Why is this so important?
- It’s a Litmus Test: If your ears are not in the water, your head is not back far enough. It’s that simple. Many people think they are leaning back, but they are still subconsciously tensing their neck muscles to keep their head partially lifted.
- It Aligns Your Spine: Submerging your ears ensures your head is properly aligned with your spine, creating a straight, buoyant line. Lifting your head, even slightly, breaks this line and acts as a trigger for your hips and legs to sink.
Getting used to the sensation of water in your ears can feel strange at first, but it is a non-negotiable part of floating. Practise just this part of the movement a few times until the feeling becomes normal.
4. Look Straight Up

Find out why fixing your gaze on the sky is the key to keeping your body perfectly balanced in the water.
Once your head is back and your ears are submerged, the next step is to direct your focus. Your natural instinct will be to look towards your feet to see what they are doing. You must resist this urge with everything you’ve got.
Your body in the water acts like a seesaw. Your head is on one end, and your legs are on the other. If you lift your head to look at your feet, you are adding weight to one end of the seesaw, which will inevitably cause the other end, your legs, to sink.
To keep the seesaw perfectly balanced, you must fix your gaze directly upwards.
- Find a Focal Point: If you are outdoors, look at a specific cloud in the sky. If you are indoors, find a light fixture or a mark on the ceiling. Stare at that single point.
- Keep Your Chin Pointed Up: Your chin should be the highest point of your face, pointing directly towards the ceiling or sky. This helps to lock your head into the correct, stable position.
5. Extend Your Arms Into A “Starfish” Position
See how spreading your arms and legs helps to distribute your weight evenly, making you far more stable.
Once your head is in the correct position, the next step is to create a wide, stable base with your body. Think about the difference between a narrow canoe and a wide raft; the raft is far more difficult to tip over because its weight is spread out. You want your body to be more like the raft.
With your support still in place, slowly move your arms out from your sides. You have two main options, and you can experiment to see which feels more stable for you:
- The “T” Position: Extend your arms straight out to your sides, level with your shoulders. Keep your palms facing up towards the sky. This is a great starting position that provides excellent balance.
- The “Y” Position: For many people, especially those whose legs feel heavy, this position is even better. From the “T” position, move your arms further up so they are above your head, forming a wide “Y” shape. This shifts more weight towards your head, which acts as a better counterbalance to your legs and helps to keep them up.
At the same time, don’t keep your legs squeezed together. Allow them to separate naturally and relax. You are aiming for a wide, relaxed “starfish” shape. This position distributes your mass over the largest possible surface area, allowing the water to do its job of supporting you much more effectively.
6. Lift Your Hips And Core
Master the technique of pushing your belly button towards the sky to stop your legs from sinking.
This is the final piece of the body-positioning puzzle and the direct solution to the most common problem in back floating: sinking legs.
Your legs are often the densest part of your body with the least fat and the most muscle, so they naturally want to drop. To counteract this, you need to create a straight, horizontal line with your body.
While still holding onto your support, and with your head back and arms out, consciously focus on your middle section.
- Push Your Hips Up: Actively push your hips and stomach up towards the surface of the water. The best mental cue for this is to imagine a string is attached to your belly button and is pulling it straight up towards the sky. You should feel your lower back straighten out.
- Engage Your Core: Gently tighten your stomach muscles, as if you are bracing yourself. This helps to stabilise your torso and prevents your body from sagging in the middle like a hammock.
- Keep a Straight Line: Your goal is to have your body, from your shoulders to your knees, resting just at the surface of the water in a relatively straight line. You are not trying to arch your back excessively, but simply preventing your hips from dropping.
When you lift your hips, you are aligning your body’s centre of gravity, making it much easier to stay balanced and horizontal.
7. Take A Deep Breath And Hold It
Understand how to use your lungs like natural floatation devices to lift your body effortlessly.
Now, it’s the moment of truth. You are in the perfect position, and it’s time to let go and float. The final ingredient is air. Your lungs are powerful, built-in floatation devices. When they are full of air, they make your upper body incredibly buoyant.
- Take a Deep, Calm Breath: Before you do anything else, take one final, slow, deep breath in and hold it gently. Don’t puff out your cheeks or hold it with tension. Just feel your chest rise as your lungs fill up.
- Gently Lift Your Feet: With your lungs full, you can now slowly lift your feet from the pool floor. If you are holding the wall, gently push off. Don’t kick or make any sudden movements. Simply allow your feet to drift up towards the surface.
You should feel your body become light as the water takes your full weight. For these first few seconds, continue to hold that breath as you find your balance.
Once you feel stable, you can begin to breathe slowly and rhythmically. Notice how your body sinks slightly as you exhale and rises again as you inhale. This is the natural rhythm of floating.
8. Make Small Adjustments And Recover

Learn how to handle slight wobbles with calm, minor adjustments to maintain your float for longer.
It’s very unlikely that your first float will be perfectly still. You will probably feel yourself wobble or tip slightly to one side. This is completely normal. The key is not to panic. A sudden, jerky reaction is what will cause you to sink.
Instead, learn to make small, calm corrections.
- Use Your Hands for Balance: Your hands are your rudders. If you feel yourself tipping to the left, make small, gentle sculling motions with your right hand (imagine calmly spreading jam on toast) to push yourself back to centre.
- Correct Sinking Legs: If you feel your legs start to drop, what should you do? Don’t kick! Instead, go back to basics: push your hips up a little higher and, if needed, move your arms further up into the “Y” position.
- Know How to Stand Up: When you are ready to finish, do it with control. First, tuck your chin to your chest. Then, bring your knees towards you and sweep your arms forward. This sequence will bring your feet down to the floor so you can stand up smoothly.
Floating is a skill of finesse, not force. The more you practise making these tiny adjustments, the more stable you will become, until you can hold a relaxed, effortless float for as long as you wish.
Why Do We Need To Float In Water?

Before we dive into the ‘how’, let’s explore why floating is a fundamental water safety skill and the very foundation of effortless swimming.
For many, learning to float seems like just a neat trick to show off at the pool. In reality, it’s one of the most important, yet underrated, skills you can master in the water. It’s the key that unlocks everything from basic safety to confident, efficient swimming.
Let’s break down why it’s so essential.
1. It Is Your Most Important Water Safety Skill
Imagine for a moment you accidentally find yourself in deep water, perhaps after slipping at the poolside or getting a sudden leg cramp whilst swimming.
The natural human instinct is to panic, thrash around, and try to keep your head as high out of the water as possible. This is not only exhausting but also incredibly dangerous.
This is where floating becomes your lifeline. By simply lying back and floating, you can:
- Conserve Precious Energy: Treading water burns a surprising amount of energy. Floating, on the other hand, requires almost none once you relax. In an emergency, this conserved energy could be the difference between staying calm until help arrives and becoming completely exhausted.
- Control Your Breathing: When you float on your back, your airway is clear of the water. This allows you to control your breathing, calm your heart rate, and prevent the panic from taking over. A calm mind makes better decisions.
- Signal for Help: It is far easier to call for help or wave an arm when you are calmly floating on your back than when you are struggling to stay afloat.
2. It Is The Foundation Of Good Swimming Technique
Have you ever watched a competitive swimmer glide through the water? They look completely at ease, as if they are part of the water itself. This effortlessness comes from a simple principle: they aren’t fighting to stay up. Their body is perfectly horizontal and buoyant, a position they master first through floating.
Learning to float teaches you how to achieve this streamlined position. When your body is flat on the surface, you create far less drag, meaning you can move through the water with less resistance.
Whether you’re learning freestyle or backstroke, a good body position, born from the principles of floating, allows you to use your energy for moving forward, not just for staying afloat.
3. It Builds Unshakeable Water Confidence
For most beginners, the biggest barrier to learning to swim is fear, specifically, the fear of sinking. Your brain tells you that if you stop moving, you will drop like a stone.
Learning to float directly challenges and defeats this fear. The first time you successfully float, you have a “lightbulb” moment. You prove to yourself that the water can and will support you. This newfound trust is a massive psychological victory.
It makes you more willing to put your face in the water, to try new strokes, and to venture into the deep end, because you know you have a safe, restful position you can always return to. It transforms the water from something you have to battle into something you can work with.
Tips On How You Can Safely Stand Up After Floating

Getting back on your feet is just as important as floating, so here’s how to do it smoothly and without panic. The transition from a horizontal float to a vertical stand can feel a bit disorienting at first. The key is to follow a deliberate sequence of movements rather than making a sudden, rushed attempt to sit up.
The “Tuck And Curl” Method
Learn how to use your body’s momentum to easily curl up and bring your feet back under you.
This is the most fundamental and reliable technique for standing up. It uses your own body weight and a change in shape to pivot you from a floating to a standing position. Think of it as folding your body in half in a slow, controlled manner.
The Sequence:
- Start with Your Head: The very first movement is to tuck your chin firmly down towards your chest. This action alone breaks your streamlined position and signals to your body that it’s time to change orientation. It immediately begins to shift your balance, causing your legs to start dropping.
- Bring Your Knees In: At the same time as you tuck your chin, pull both of your knees in towards your stomach. The goal is to curl yourself into a compact, ball-like shape. By making yourself smaller and less spread out, you reduce your buoyancy and make it much easier for your body to rotate downwards.
Use Your Arms To “Press” The Water Down
Discover how a simple sweeping motion with your arms can help lift your upper body up effortlessly.
To make the “Tuck and Curl” method even smoother and more controlled, you can use your arms to give you a helpful boost. This technique uses the water’s natural resistance to your advantage, turning it into a supportive surface you can push against.
The Action:
As you are tucking your chin and bringing your knees in, perform a sweeping motion with both arms.
- Start the Sweep: Begin with your arms out in their “starfish” position.
- Press Down and Forward: Sweep your hands and forearms in a wide arc downwards and forwards, towards where your feet used to be. Imagine you are sitting in a comfortable armchair and using the armrests to push yourself into a standing position. In this case, the water is your armrest.
This pressing motion creates an upward force that lifts your head and shoulders, making the transition feel less like you’re falling and more like you are performing a controlled sit-up. It gives you the momentum you need to get upright smoothly.
Exhale Forcefully As You Begin To Stand
We’ll share a clever breathing trick that makes sinking your legs and standing up much easier.
This is a subtle but incredibly effective trick that works with the principles of buoyancy. It’s a small detail that can make a huge difference, especially if you feel like you are struggling to get your feet down.
The Technique:
Just as you begin the “Tuck and Curl” and arm-press motions, blow a significant amount of air out through your mouth or nose with a “whoosh” sound.
Why It Works:
Your lungs, when they are full of air, are your primary floatation devices. They are what make your chest so buoyant and keep your upper body high in the water. By forcefully exhaling, you temporarily empty these “floaties,” which reduces your buoyancy for a crucial second or two.
This momentary decrease in buoyancy makes it much easier for your upper body to move downwards and for your feet to sink to the pool floor. It removes the resistance that a chest full of air creates, allowing the entire standing-up sequence to happen more quickly and with far less effort.
5 Common Back-Floating Mistakes And How To Fix Them

If you’re struggling to hold your float for more than a few seconds, don’t be discouraged. You are likely making one of these five very common errors. The good news is that once you identify what you’re doing, it’s much easier to correct. Let’s identify and fix them together.
1. Lifting The Head To “See” What’s Happening
The Mistake: This is, without a doubt, the number one reason beginners sink. The moment you feel a little unsteady, your instinct screams at you to lift your head, tuck your chin, and look at your feet to see what’s going on.
Why It Causes Sinking: Your body in the water behaves like a seesaw. Your head and your legs are at opposite ends.
When you lift your head, you are putting weight on one end of the seesaw, which automatically forces the other end, your legs, to drop straight down. It’s a simple law of physics, and it’s unavoidable. No amount of kicking or arm-waving can save you once your head is up.
How to Fix It: You must learn to trust the water and fight that instinct. The rule is simple: your ears must stay in the water. Commit to letting your head rest back completely, as if it’s a heavy bowling ball lying on a cushion.
Fix your gaze on a single point on the ceiling or in the sky and do not look away. When you feel the urge to check on your feet, remind yourself that looking is what causes the problem in the first place.
2. Holding Tension In The Body
The Mistake: A nervous floater is a tense floater. You might be clenching your fists, hunching your shoulders up to your ears, or keeping your neck muscles rigid. You might not even realise you’re doing it.
Why It Causes Sinking: Tense muscles are dense, hard muscles. This density works directly against your body’s natural buoyancy.
Think of it this way: a relaxed, loose sponge floats, but if you squeeze all the air out of it and make it dense, it sinks. When you hold tension, you are essentially making your body less buoyant and telling it to sink.
How to Fix It: Before you even start, perform a mental body scan. Consciously relax your jaw, drop your shoulders away from your ears, and let your hands and fingers go limp.
During the float, focus on slow, deep breathing. This not only keeps your lungs full of air but also helps to keep your muscles relaxed. If you feel yourself tensing up, gently wiggle your fingers and toes to remind them to stay loose.
3. Keeping An Arched Back With Sagging Hips

The Mistake: In an effort to keep their chest high, many learners overcompensate by arching their back significantly. This causes their stomach and hips, the heaviest part of their core, to sag down into the water, creating a “V” or hammock shape.
Why It Causes Sinking: A successful float requires a straight, horizontal line from your shoulders to your knees.
When your hips drop, you break this streamlined position. This not only puts your body at an inefficient angle but also creates drag, which pulls your lower body down even further, eventually taking the rest of you with it.
How to Fix It: The solution is to actively engage your core. Use the mental cue we discussed earlier: imagine a string pulling your belly button straight up to the sky. You should feel your hips rise until they are just below the surface of the water.
Gently tighten your stomach muscles to maintain this straight line. Your body should feel like a flat plank or raft, not a sagging hammock.
4. Incorrect Arm And Leg Positioning (The “Pencil” Float)
The Mistake: Some beginners believe that keeping their body in a tight, narrow line, like a pencil, is the most streamlined way to float. They keep their arms pressed against their sides and their legs squeezed tightly together.
Why It Causes Sinking: While a pencil shape is great for moving through the water, it’s terrible for floating on the water. Floating is all about stability and distributing your weight over a large surface area. A narrow shape concentrates all your weight in one unstable line, making you incredibly easy to tip over.
How to Fix It: Think “starfish,” not “pencil.” Spread your arms out wide into a “T” or “Y” position and allow your legs to separate naturally.
This creates a much wider, more stable base. Just like a wide raft is harder to capsize than a narrow log, a starfish shape makes you far more stable and allows the water to support you much more effectively.
5. Panicking And Making Sudden Movements
The Mistake: You feel a slight wobble or your leg dips a tiny bit, and your immediate reaction is to panic. You might jerk your head, flail your arms, or kick your legs frantically in an attempt to “save” yourself.
Why It Causes Sinking: Ironically, the panicked reaction is almost always what causes you to sink, not the initial wobble. Calm water provides a stable, supportive surface. When you make sudden, jerky movements, you create turbulence and break that surface tension. You are essentially disrupting the very thing that is holding you up.
How to Fix It: You must train yourself to react slowly and calmly. When you feel a wobble, resist the urge to make a big movement. Instead, make a small, gentle correction.
If you’re tipping, use your hands to make a slow sculling motion. If your legs feel like they’re dropping, don’t kick, slowly push your hips up. Treat the water with finesse, not force. The less you fight it, the more it will support you.
Conclusion About Floating On Water On Your Back
Each time you practise, you are reprogramming your instincts, trading tension for trust. You now have the knowledge to turn that sinking feeling into a serene, confident float.
While these steps provide a brilliant foundation, we understand that having an expert by your side can make all the difference, transforming nervousness into genuine confidence. If you or your family are ready to take the next step, consider our lessons at JustSwim Singapore.
Established in 2020 by a dedicated team of competitive swimmers, triathletes, and lifesavers, we specialise in private swimming lessons. We believe learning is most effective in small, focused groups where our patient and experienced coaches can truly maximise your progress.
With our unique, fun-focused teaching approach and customised lesson plans for everyone including kids’ swimming lessons, we guarantee you’ll pick up the right techniques. Our coaches don’t leave the pool until you get your strokes right.
Ready to turn theory into practice? Get in touch with JustSwim Singapore today, and let’s start your journey to becoming a confident swimmer.
Frequently Asked Questions About Floating On Water On Your Back
Why Do My Legs Always Sink First When I Try To Float On My Back?
This is the most common challenge learners face. It’s usually caused by your body’s balance point; your legs are often denser than your upper body. To fix this, focus on pushing your hips up towards the surface and try moving your arms further above your head in the water to act as a counterbalance.
Is It True That Some People Physically Cannot Float?
While it’s true that body composition (higher muscle density vs. body fat) affects buoyancy, it is extremely rare for someone to be completely unable to float. With the correct technique, especially proper breathing and body position, virtually everyone can learn to float successfully.
How Long Does It Typically Take To Learn How To Back Float?
This varies greatly from person to person. Some may grasp the basics in a single session, while others might take a few weeks of consistent practice. The key factors are your comfort level in the water and your ability to relax. Patience is essential.
What Is The Best Way To Practise Back Floating If I Don’t Have A Spotter?
Always practise in the shallow end of the pool where you can comfortably stand up at any moment. Start by holding onto the side of the pool, get into your floating position, and then gently let go for a few seconds at a time, gradually building up your duration.
Does Floating On Your Back Feel Different In A Swimming Pool Versus In The Sea?
Yes, significantly. It is much easier to float in the sea because the salt makes the water denser, which in turn makes you more buoyant. The principles remain the same, but you’ll likely find you float higher and with less effort in saltwater.